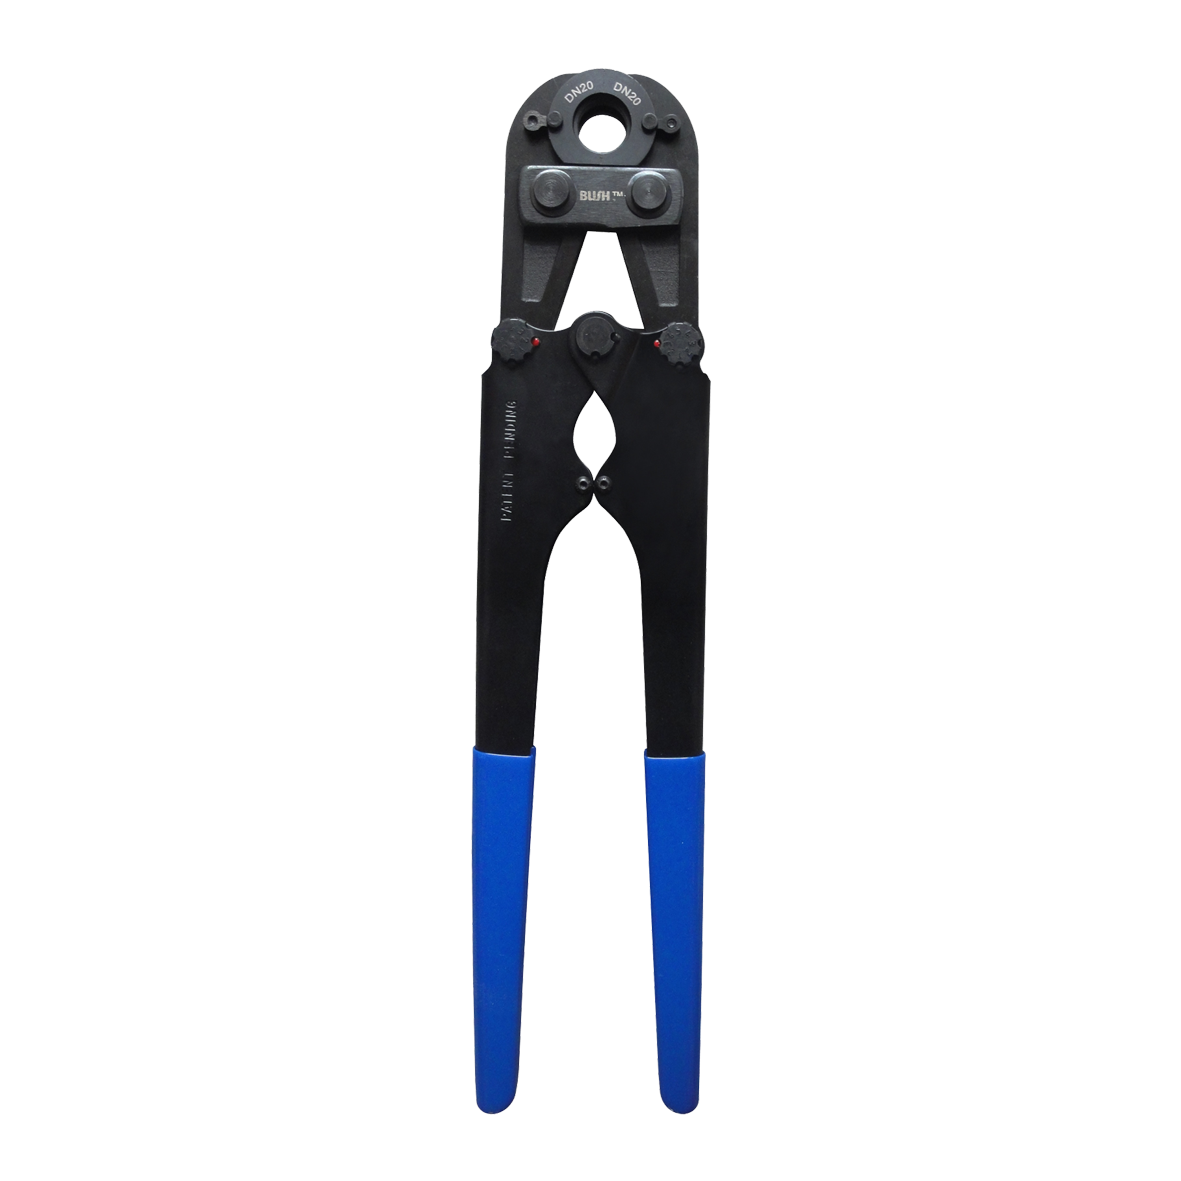
Tool inspection Manual Tools:
Inspect the tool and jaw to ensure it is in good working order, operates properly and approved for use with BUSHPEX Crimp-on fitngs and pipe. Visually inspect and ensure the jaws align and have no gap when the crimp tool is fully compressed and closed. The jaws must be clean and undamaged – free of defects, debris and corrosion. Always keep clean and dry and lubricate after use. If a gap is visible between the jaws then the tool must be adjusted, (see Tool Adjustment section and follow the instruction).

WARNING: An incompatible tool, incorrectly adjusted tool or damaged jaws may result in a joint failure, tool damage or both. It will also void the warranty!
Manual Tool Adjustment: The tool will require adjustment if the jaws do not fully close when compressed OR if the crimp gauge does not pass easily over both indentations in the stainless steel sleeve after the crimping process. If this occurs, follow the procedure below and re-test the tool to ensure adjustment is correct.
- Loosen LH and / or RH “Back Nuts” with spanner.
- Turn LH and / or RH “Adjustment Dials” one increment at a time.
- Tighten LH and / or RH “Back Nuts” with spanner.
- Confirm if the jaws now fully close? If NO – repeat process ( 1 ) to ( 4 ). If YES – go to step 5.
- Crimp a joint then check with the crimp gauge until the crimp gauge
- passes easily over both indentations in the stainless steel crimped sleeve
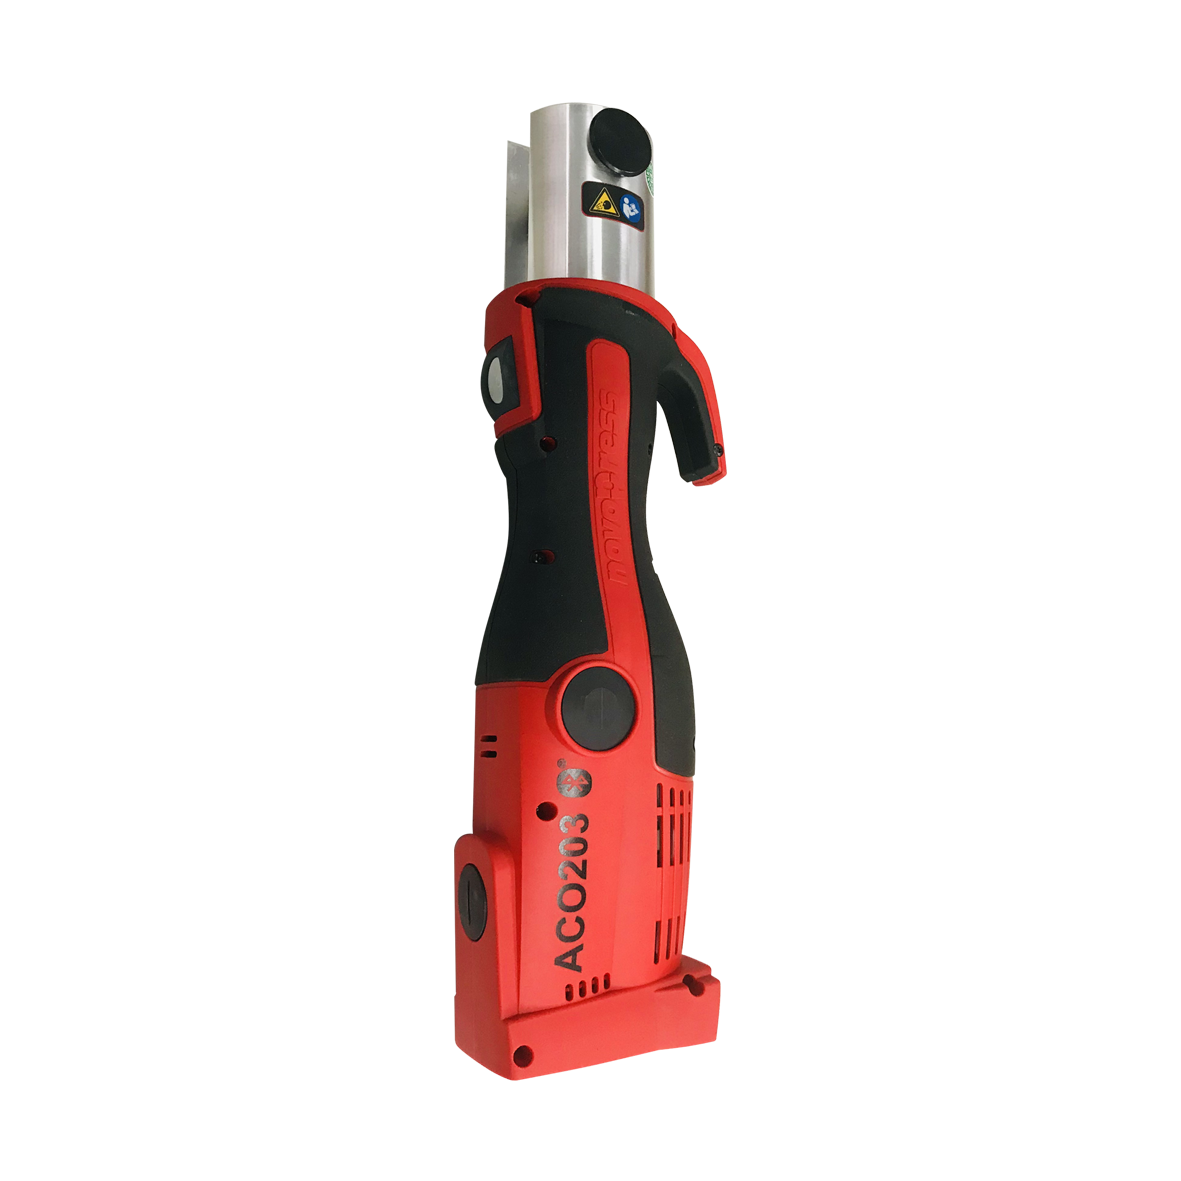
Battery Tools:
Tested and approved tools include:
Novopress ACO153, Novopress ACO-203.
Above battery tools all require specific BUSHPEX Jaws to suit the BUSHPEX Crimp-On plumbing system

- Before using the battery tool it is essential that the user reads and recognises the instructions contained in the manual included with every tool. Make sure you are aware of the operating features and functions.
- Ensure that only BUSHPEX compatible jaws are used to match the tool. Check the jaw matches the diameter of the BUSHPEX pipe and BUSHPEX Crimp-On fitings.
- Inspect and test all tools prior to use to ensure they are functioning properly.
- Visually inspect all tools and jaws to ensure they are clean, dry, free of dust, dirt, grit and corrosion.
- It is a requirment to check every crimped joint with the crimp gauge by passing the crimp gauge over both indentations in the stainless steel sleeve to ensure proper crimping function.
- if the battery warning light comes on or any detection of incomplete crimping occurs you must change the battery immediately, check the joint with a crimp gauge and re-crimp as necessary.
- If the crimping tool does not fully compress or the jaws do not fully close, release the trigger, actuate the retract slide, check the tool then re-crimp the joint and check with the crimp gauge to ensure conformance.
Jointing Procedure:
- Cut the pipe straight and square using BUSHPEX pipe cuters. Check for any damage to the pipe including any surface damage, cuts, scores, abrasion, kinks, splits, heat damage. Re-cut or replace and remove any physically damaged pipe.

- Round and debur the end of the pipe using either the specific sized BUSHPEX manual calibrating tool or the BUSHPEX Battery drill Calibrating tool. Match the size of the calibrating tool to the pipe. Insert the calibrating tool completely into the end of the pipe with a twisting actionandrotate 2-3fullturns.Remove all swarf from outside and inside the pipe.


- Visually inspect the inside of the fitng to ensure it is free of dust, dirt and grit and confirm the 2 “O” rings are intact and undamaged.

- Insert the BUSHPEX pipe into the BUSHPEX Crimp-On fitng. Ensure that the pipe is fully inserted into the fitng by viewing the pipe through the 4 inspection holes in the blue plastic retaining ring.


- For BUSHPEX Manual Crimping Tools: Centralise the BUSHPEX Manual tool – sized to suit the pipe and fitng with jaws over the stainless steel crimp ring and buted up against the blue retaining ring. Slowly bring the lever handles together closing the jaws completely compressing the joint. NOTE: DO NOT positon the manual tool crimp jaws over the blue retaining ring. This will damage the fitng, destroy the integrity of the fitng and void warranty. If this occurs you must cut-out the fitngs and replace immediately.

- For BUSHPEX approved Batery Crimping Tool: Align the Batery tool jaw to seat over the plastic retaining ring at one end and cover the stainless crimp ring. This position locates the jaw onto the fiting. Activate the batery tool and compress the stainless crimp ring completely until the jaw is closed.

- Check each joint has been compressed correctly by using the BUSHPEX Crimp Gauge. If the BUSHPEX Crimp Gauge does not pass over the crimp indentations check tooling, inspect and adjust the tool according to instructions, then re-crimp and test.

BUSHPEX Crimp-On Calibration Tool Battery Drill Calibration Tool
Specific tooling for BUSHPEX Crimp-On water.
IMPORTANT NOTES:
Always set the drill speed no greater than 500rpm.
Water & Gas calibrating tools are NOT interchangeable.
Calibration Procedure BUSHPEX Crimp-On Water:
- Confirm you have all tooling to complete the job – DO NOT start without these: BUSHPEX Crimp-On Water Calibration tool – sized to suit the pipe, Battery Drill – charged, BUSHPEX Crimp Gauge, BUSHPEX pipe & fitings.

- Cut the BUSHPEX pipe to length, using BUSHPEX pipe cutter. Calibrate the end of the BUSHPEX pipe using the specific sized calibrating tool to round and deburr the end of the pipe. Ensure the calibrating tool has been completely inserted into the BUSHPEX pipe with at least 2-3 full turns. Remove all swarf from outside and inside of pipe.


IMPORTANT:
- Pressure test the complete installation in accordance with AS/NZS 3500.
- This system must be installed by a licenced Plumber in accordance with
- It is requirment to incorporate a visual checking system to confirm every
- joint has been crimped prior to concealing joints. This should be done with a crimp gauge test on every joint.
- this procedure otherwise warranty will be void.
